Focused damage
One main damage source should receive the best upgrades first so the fight has a real clear condition.
Stage guide
Stage 5-30 blocks players who have enough roster power on paper but not enough role clarity in the actual fight.
To beat Clash of Critters 5-30, stop spreading upgrades across the whole roster. Pick one reliable carry, add control or survival for the pressure point, and retry with one change at a time.
This page follows the wiki guide format: answer the player problem first, show the relevant visual reference, explain the common mistake, then turn the advice into a repeatable decision table. Use it with the linked pages instead of treating one guide as a standalone rule.
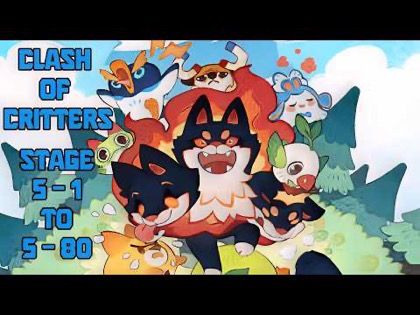
Visual reference
The guide cover gives this page the same visual signal players expect from the competitor guide library, while the sections below provide the actual decision logic.
Start by watching the first failed attempt instead of changing the team immediately. Stage 5-30 usually tells you what is wrong in the first half of the fight: enemies reach your side too quickly, the team survives but cannot finish, or one specific wave breaks the lineup. Each failure points to a different fix, so the correct answer is not always another damage upgrade.
Use this guide as a diagnosis page. First, identify whether the blocker is damage, survival, control, or enemy pressure. Second, use the team blueprint below to check which job your lineup is missing. Third, make one change and retry. If the failure point moves later in the fight, the change helped. If the same failure repeats, return to the decision table and solve the next likely weakness.
Team blueprint
Use this table before spending Candy or swapping multiple Tataris at once.
| Team slot | What it must do on 5-30 | Warning sign | Best fix |
|---|---|---|---|
| Main carry | Clear the durable enemies before the fight drags too long. | You survive but the stage times out or enemies stay healthy. | Push upgrades into the carry before touching bench units. |
| Control slot | Slow, interrupt, or reduce wave pressure long enough for the carry to work. | Enemies reach your side before your damage matters. | Replace a low-impact attacker with control or crowd pressure. |
| Survival slot | Keep the team alive through the first dangerous wave. | The run collapses early even when damage looks good. | Add bulk, shielding, sustain, or a sturdier frontline role. |
| Support or flex | Boost the carry or cover the exact weakness shown by the failed attempt. | The team has many upgraded units but no clear synergy. | Pick one support job instead of adding another random damage unit. |
The biggest 5-30 mistake is leveling every interesting Tatari equally. That creates a roster that looks busy but has no clear carry, no stable defensive answer, and no way to learn from retries. Stage 5-30 punishes that because the fight needs a complete lineup, not five half-built favorites.
The fix is to name the exact blocker before spending. If the blocker is damage, invest in damage. If the blocker is early collapse, stabilize the team. If the blocker is one specific wave, read the enemy pressure before rebuilding. A focused team with one clear upgrade path is usually stronger than a wider roster with no answer to the actual stage.
The safest priority order is carry first, stabilizer second, enemy-specific adjustment third. Your main carry should receive the upgrades that directly change the clear. If the carry already does enough damage but the attempt fails early, shift priority to survival or control. If the team only loses to one wave, the next step is not a full rebuild; it is a matchup check through Zobos and roles.
After reading this page, do not make five changes at once. Pick the row that describes your current situation, follow the action, and test the result. If the result improves, continue in that direction. If the result does not improve, return to the related page and diagnose the next likely blocker. Keep a short note of what changed so future retries become easier to interpret and compare with later updates.
Priorities
One main damage source should receive the best upgrades first so the fight has a real clear condition.
If enemies reach your side too early, a stabilizing slot is more useful than another unfinished attacker.
When one wave causes the loss, check Zobos before spending resources on a broad roster rebuild.
Change one slot, upgrade, or role at a time so you know what actually moved the run forward.
Upgrade plan
| Upgrade target | Use it when | Do not use it when | Related page |
|---|---|---|---|
| Carry damage | The team survives but cannot finish the stage. | The team dies before the carry can attack enough. | Tier List |
| Frontline or survival | The first dangerous wave ends the attempt. | The run already lasts long but lacks damage. | Roles Guide |
| Control utility | Enemies stack up and overwhelm your side. | The boss-like target needs pure focused damage. | Zobos |
| Support boost | Your carry is strong enough to benefit from support. | You do not yet have one reliable damage source. | Best Team |
Decision framework
Use this table after one failed attempt, before spending more resources.
| Situation | What it means | Best action | Next page |
|---|---|---|---|
| Enemies reach your side early | Control or survival is missing. | Swap one damage slot for control, bulk, sustain, or a steadier frontline. | Roles Guide |
| Fight times out | Damage focus is too scattered. | Upgrade the carry instead of spreading Candy across the whole roster. | Tier List |
| One wave causes the loss | Enemy pressure is misunderstood. | Check the Zobos database before rebuilding the team from scratch. | Zobos |
| Progress barely changes | You are testing too many changes at once. | Retry with one slot, role, or upgrade change only. | Best Team |
Checklist
Keep the same team for one more attempt so you can confirm the real failure point.
Upgrade or swap only the unit that changes that failure point.
Check Zobos if a specific enemy pattern breaks the run.
After clearing, record which role fixed the wall so the next stage is easier.
FAQ
It is hard because it punishes unfocused upgrades and teams that lack either a carry, control, or survival.
Use one focused carry, one support or control option, and enough survival to keep the carry active.
Upgrade damage if you survive but time out. Upgrade survival or control if the team collapses early.
Go to Best Team, Zobos, and the guide hub so the next stage wall has a clearer plan.